Appliance & electronics support
Find your model numberAbout our sources
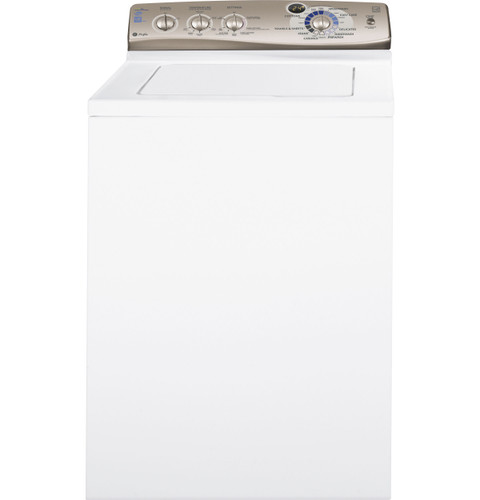
GE Profile PTWN6250MWT washer — manufacturer product image
Photo: PTWN6250MWT. Shared source photo. Photo source
Manufacturer sources

GE Profile PTWN6250MWT

Drainage & water removal

Washing machine · US market · 48 owner topics

GE Profile PTWN6250M / PTWN6250MWT HydroWave Infusor washer

Covers PTWN6250MWT and the manufacturer-listed models in this family.

GE Profile PTWN6250M / PTWN6250MWT HydroWave Infusor washer

Route and secure the washer drain hose

The installation sheet permits drainage to a standpipe or set tub and requires an open standpipe at least 1 1/2 inches in diameter. Discharge height is no lower than 30 inches and no higher than eight feet above the washer base. Routing affects siphoning, overflow and whether the tub empties.

The owner troubleshooting table also flags a kinked hose and excessive drain height. Secure the hose with the supplied tie; do not seal the standpipe around it.

  1. Secure rear clamp with the two installation screws.
  2. Use an open standpipe/set tub, supplied tie, and kink-free route.
  3. Use supplied anti-siphon clip for low drain; follow height limits.

Secure hose at the washer outlet

The installation guide shows inserting the hose into the washer’s rear outlet until its clamp is about one-half inch from the cabinet, then fastening it with two screws. Check the hose is fully seated and the retaining screws are secure. A loose connection can spill during pump-out.

Route the free end into a standpipe or set tub and secure it with the supplied tie so pumping cannot dislodge it. If valves and drain are built into a wall, the guide shows securing the drain hose to a water hose with the provided tie.

Keep drain height and standpipe within limits

Installation requires discharge height between 30 inches and eight feet above the washer base; a standpipe must have at least 1 1/2-inch inside diameter and remain open to atmosphere. Measure from the base as stated, rather than estimating from the floor.

The owner troubleshooting chart notes an outlet top above six feet from floor can contribute to non-draining. Because the documents use different reference descriptions, follow the specific installed configuration and ask a plumber to verify if the outlet approaches the upper limits; do not extend it higher.

Use the anti-siphon clip when required

If the drain cannot meet the 30-inch minimum, the installation sheet directs the installer to route the hose through the supplied anti-siphon clip and mount it on the cabinet back as illustrated. It prevents low hose placement from drawing water out during filling.

Do not improvise by sealing the hose into a pipe or raising it above the specified maximum. If the clip is missing or plumbing cannot meet the figure, obtain the correct part or ask a plumber to adjust the standpipe/set tub.

Check the path when water remains

If the tub does not empty, inspect the visible hose for kinks, pinching under the washer, loose rear connection or rubbing on an edge. The owner manual says straighten the hose and ensure the cabinet is not sitting on it. After correcting external routing, choose Drain & Spin to remove remaining water.

If the hose is clear and secured but water remains, the home drain may be blocked or service may be required. Do not reach through the basket or remove a panel to access a pump. Stop if water is leaking near the cord or onto the floor.

Two documents give different upper drain limits

The installation sheet gives a discharge range of 30 inches to 8 feet above the washer base. The owner manual’s drainage troubleshooting table instead says the top of the drain outlet should be less than 6 feet above the floor. These are different instructions in the documents GE links to this product. If your drain is near or above 6 feet, have GE or the installer confirm the requirement for the full model and serial before changing the routing; do not use the larger figure as a diagnosis or a guarantee of adequate pumping.

Water fills and drains simultaneously.

Low or unsecured routing can permit siphoning.

Check 30-inch minimum and supplied anti-siphon clip directions.

Tub retains water and visible drain hose is kinked.

External drain path is obstructed.

Straighten hose and ensure washer does not compress it.

Secure hose but standpipe backs up.

Household plumbing may be blocked.

Stop use and have the drain checked.

Common questions

Can I push the hose far down the standpipe?

No. Follow the install drawing, secure it with the tie, and leave the standpipe open to atmosphere.

What if drain is below 30 inches?

The install sheet shows use of its supplied anti-siphon clip mounted at the rear.

Specifications & model details

PTWN6250MWT: model-specific checks

Recorded model facts

Model details relevant to this topic

SpecificationRecorded valueEvidence
Branch circuitIndividual grounded circuit; 15 or 20 A breaker or time-delay fuse
Manufacturer
GE Profile PTWN6250M — specs

Exact-model manufacturer resource; Specification 260192, revised 4/11, pp. 1–2; explicit base and finish listing

GE specification 260192, revised 4/11, titles the base PTWN6250M and explicitly lists finish model PTWN6250MWT. Base/retail relationship is documented here; no other suffix or serial range is inferred. Specification 260192, revised 4/11, pp. 1–2; explicit base and finish listing

Observed Oct 27, 2026
Electrical rating120 V, 60 Hz, 10 A
Manufacturer
GE Profile PTWN6250M — specs

Exact-model manufacturer resource; Specification 260192, revised 4/11, pp. 1–2; explicit base and finish listing

GE specification 260192, revised 4/11, titles the base PTWN6250M and explicitly lists finish model PTWN6250MWT. Base/retail relationship is documented here; no other suffix or serial range is inferred. Specification 260192, revised 4/11, pp. 1–2; explicit base and finish listing

Observed Oct 27, 2026
Maximum drain outlet heightNeeds resolution
Manufacturer
GE Profile PTWN6250M — owner

Exact-model manufacturer resource; Owner manual 49-90400-1, 07/06/10; pp. 1, 4–7, 9

GE specification 260192, revised 4/11, titles the base PTWN6250M and explicitly lists finish model PTWN6250MWT. Base/retail relationship is documented here; no other suffix or serial range is inferred. Owner manual 49-90400-1, 07/06/10; pp. 1, 4–7, 9 Document difference: installation p. 1 permits up to 8 ft above base; owner p. 8 says outlet below 6 ft above floor. Confirm with GE for the full model/serial; no single upper limit is resolved.

Observed Oct 27, 2026

Other observations retained:

96 in — GE Profile PTWN6250M — installation; Exact-model manufacturer resource; Manufacturer-linked installation instructions, p. 1; plumbing requirements

Minimum discharge height above washer base30 in
Manufacturer
GE Profile PTWN6250M — installation

Exact-model manufacturer resource; Manufacturer-linked installation instructions, p. 1; plumbing requirements

GE specification 260192, revised 4/11, titles the base PTWN6250M and explicitly lists finish model PTWN6250MWT. Base/retail relationship is documented here; no other suffix or serial range is inferred. Manufacturer-linked installation instructions, p. 1; plumbing requirements

Observed Oct 27, 2026
Minimum standpipe inside diameter1 1/2 in
Manufacturer
GE Profile PTWN6250M — installation

Exact-model manufacturer resource; Manufacturer-linked installation instructions, p. 1; plumbing requirements

GE specification 260192, revised 4/11, titles the base PTWN6250M and explicitly lists finish model PTWN6250MWT. Base/retail relationship is documented here; no other suffix or serial range is inferred. Manufacturer-linked installation instructions, p. 1; plumbing requirements

Observed Oct 27, 2026
Motor SpeedsVariable
Manufacturer
GE — PTWN6250MWT

Exact-model manufacturer resource; specification fields

Exact SKU PTWN6250MWT; manufacturer specification label: Motor Speeds.

Observed Oct 27, 2026
Supply water pressure10–150 psi
Manufacturer
GE Profile PTWN6250M — installation

Exact-model manufacturer resource; Manufacturer-linked installation instructions, p. 1; plumbing requirements

GE specification 260192, revised 4/11, titles the base PTWN6250M and explicitly lists finish model PTWN6250MWT. Base/retail relationship is documented here; no other suffix or serial range is inferred. Manufacturer-linked installation instructions, p. 1; plumbing requirements

Observed Oct 27, 2026
Voltage120 V
Manufacturer
GE Profile PTWN6250M — specs

Exact-model manufacturer resource; Specification 260192, revised 4/11, pp. 1–2; explicit base and finish listing

GE specification 260192, revised 4/11, titles the base PTWN6250M and explicitly lists finish model PTWN6250MWT. Base/retail relationship is documented here; no other suffix or serial range is inferred. Specification 260192, revised 4/11, pp. 1–2; explicit base and finish listing

Observed Oct 27, 2026
Volts/Hertz120V; 60Hz
Manufacturer
GE — PTWN6250MWT

Exact-model manufacturer resource; specification fields

Exact SKU PTWN6250MWT; manufacturer specification label: Volts/Hertz.

Observed Oct 27, 2026
More background: Plan washer drainage and water removal

Category & symptom guidance

Plan washer drainage and water removal

Choose a compatible drain point

The installation guide identifies acceptable drain arrangements, such as a standpipe or laundry tub, and gives the permitted hose height and routing. Check those limits for the exact model and local plumbing rules. A standpipe must be suitable for the washer’s discharge and remain open as directed; a laundry tub must be able to receive the flow without overflowing.

Do not reuse dimensions from another washer. For example, the LG WM4000H*A manual states its own drain height and distance limits. The GE PTWN6250M installation instructions give different conditions for that named top-load example. The differing figures show why one product’s drain range cannot be treated as universal.

Secure the hose without sealing it

Route the hose so it is not kinked, crushed, stretched, or trapped between the cabinet and wall. Use the supplied bracket, tie, or restraint as directed to secure the hose at the drain point. A hose that comes loose can flood the room, while a hose routed too low or sealed tightly into a drain can contribute to siphoning or poor wash performance.

Follow the manual’s air-gap instructions. Do not wrap tape around the hose and drain to create an airtight connection unless the product instructions specifically call for a compatible fitting. If the drain is inside a wall or otherwise difficult to access, secure the hose using the specified method and confirm it cannot slip out during discharge.

Test discharge and look for leaks

Use the model’s installation check or an appropriate first-use cycle to observe drainage. Watch the drain point and floor for leaks, confirm the hose stays secure, and check that the washer empties as expected. Keep hands away from moving parts and do not touch draining water if it may be hot.

If water backs up, spills, or drains out while the washer is filling, stop the cycle and inspect only visible hose routing and the household drain opening. A blocked home drain may require a plumber. If the hose connection at the washer is loose or the installation requires internal access, contact authorized service rather than removing panels.

Understand common water symptoms

A washer that fills and drains at the same time may have a siphoning or drain-height issue, but the exact diagnosis depends on the installation and design. A washer that will not drain may have a kinked hose, an unsuitable drain route, or a household plumbing blockage. Check the visible hose path and compare it with the model guide before changing anything.

Do not assume a particular drain height, hose clamp, or extension kit fits every washer. Extension parts must be approved for the exact model. If the hose is damaged, the drain arrangement cannot meet the manual, or water escapes during a cycle, stop using the washer until a qualified installer or plumber corrects the problem.

What to do with what you find

Water enters the washer and immediately exits, or the tub level does not hold during fill.

The drain may be siphoning or routed outside the model’s installation limits.

Compare hose height and air-gap arrangement with the exact manual; have the installation corrected if needed.

Water backs up at the standpipe or laundry tub during discharge.

The household drain may be restricted or unable to handle flow.

Stop the test and contact a plumber.

Have these details ready

  • Exact model drain height, distance, and securing instructions
  • Observed discharge and household drain condition

Common questions

Can I seal the drain hose tightly into the standpipe?

No, unless the exact installation guide specifies a compatible sealed fitting. Many installations require an air gap to prevent siphoning.

Are drain hose height limits the same for all washers?

No. Use the exact model’s installation instructions and local plumbing requirements.

General background sources

These sources support the shared guide. Exact model specifications and matched family procedures have their own sources above.

  1. media.us.lg.com/m/6d5d734b0871fbdf/original/WM4000_Owners-Manual.pdf
  2. images.salsify.com/image/upload/s--dBhUJ9s5--/3f58f84eaa9d207a6fdadfa3a955c70b28005ee2.pdf
  3. images.salsify.com/image/upload/s--4zVee-ir--/44e1044e71329cd6678e18edc3950e53c5694077.pdf

Owner guidance by Specs & Parts, drafted with GPT-6 Luna. Sources and scope.

Sources for PTWN6250MWT

GE — PTWN6250MWT Observed Oct 27, 2026
GE Profile PTWN6250M — owner Observed Oct 27, 2026
GE Profile PTWN6250M — specs Observed Oct 27, 2026
Suggest a correction