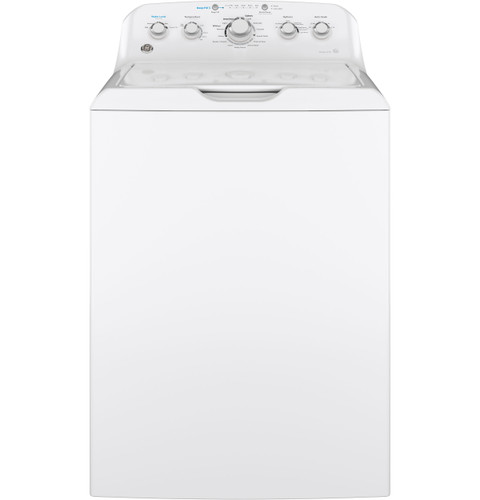
Covers GTW465ASNWW and the manufacturer-listed models in this family.
Specifications & model details
GTW465ASNWW: model-specific checks
Plan with this model’s measurements
For GE GTW465ASNWW, the source gives width 27 in (685.8 mm), height 44 in (1,117.6 mm), depth 27 in (685.8 mm). Measure the narrowest doorway, turning space and final opening using those same directions. These are product measurements; add the separately specified hose, ventilation, door/lid, handle and service space. The reported width × depth occupies about 5.06 square feet before those allowances.
Prepare a stable location and compatible services, then use the exact installation guide to coordinate setup, leveling, and an initial operating check.
Owner guide: Plan a washer installation
Category & symptom guidance
Plan a washer installation
3 minute read · Shared guidance for washing machines
Prepare the location
Choose an indoor location protected from outdoor weather and freezing temperatures, with a firm floor capable of supporting the washer during operation. Leave the model’s specified clearances around it and keep access to the water shutoffs and outlet. A soft, uneven, or flexible floor can contribute to vibration; do not assume leveling feet can correct a weak floor or an unsuitable surface.
Check that doors, cabinets, trim, and nearby appliances leave room for loading and service. Front-load washers need door swing space; top-load washers need lid clearance. If the washer will be stacked or placed on a pedestal, verify that the accessory is approved for that exact model and follow its separate instructions.
Coordinate the delivery and setup
Plan for safe movement into the home and into the final position. Manufacturer instructions may require more than one person for moving or installation. Confirm that packing materials and transport restraints will be handled as directed for the specific product. Restraints differ by design: front-load washers commonly use shipping bolts, while a top-load model may use another stabilizing component. Keep removed transport parts for any future move.
Give the installer access to the shutoff valves, drain, and grounded outlet. Clear the route and floor, and identify any concern such as a tight turn, steps, elevated platform, or long hose route in advance. Do not attempt internal adjustment or service work to make the washer install.
Confirm water and drain arrangements
Check the installation guide for the required hot and cold supplies, hose type, pressure limits, and drain arrangement. Use new hoses when the manufacturer directs; route them without kinks, stretching, or pinching. Follow the guide for hose seals, secure connections, and leak checks. A top-load HE washer may use automatic sensing, while a conventional-fill machine may behave differently; low visible water is not by itself proof of an installation fault.
The drain must be securely routed and meet the exact model’s height, distance, and air-gap or standpipe instructions. A loose hose can flood a room; a poorly arranged drain may siphon or prevent proper draining. If the home’s plumbing does not match the guide, ask a plumber or qualified installer to resolve it before operating the washer.
Level and check before laundry
The washer should sit firmly without rocking, with its feet adjusted according to the manufacturer’s instructions. On supported models, a level and gentle push test can reveal movement. Check that hoses are not trapped behind the cabinet and that the machine does not contact walls or cabinetry in a way that could transmit vibration.
After connections and setup are complete, use the installation guide’s initial check or test procedure. Observe that water enters, the machine remains stable, and water drains without leaks. The test load and controls vary by exact product; follow that model’s directions rather than copying a procedure from another washer. If there is a leak, unusual movement, or a connection concern, stop and have the installation corrected before regular use.
What to do with what you find
The washer rocks on a firm floor after the feet are adjusted per its manual.
The appliance may not be level or the floor may flex.
Recheck the feet and floor; ask an installer to assess persistent movement.
A hose connection leaks or the drain hose shifts during the initial check.
The hookup is not ready for normal operation and could cause water damage.
Stop the check and have the connection secured or repaired.
Have these details ready
Exact installation instructions
Confirmed outlet, shutoffs, drain, floor, and clearances
Common questions
Can I install a washer on any floor if I level it?
No. The floor must meet the exact model’s support and surface requirements; leveling cannot correct a weak or unsuitable floor.
Is the same transport restraint used on all washers?
No. Restraints vary by product design. Follow the exact installation guide and retain removed parts for future moves.
General background sources
These sources support the shared guide. Exact model specifications and matched family procedures have their own sources above.