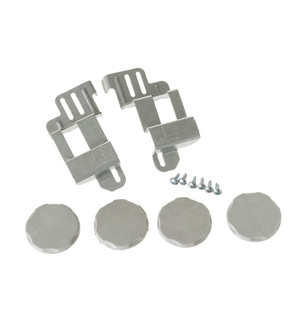
Specifications for GE24STACK with owner checks for this product design. Use the matching manual for control sequences and replacement parts.
Specifications & model details
GE24STACK: model-specific checks
Start with the source identity
GE GE24STACK is the exact code in this catalog record. This topic should be evaluated for that code and dryers category. The original source record is linked below; unrecorded settings, dates and compatibility remain unknown.
Use diagrams to understand a dryer’s documented installation and service boundaries, while keeping internal wiring work with qualified service.
Owner guide: Diagrams & wiring references
Category & symptom guidance
Diagrams & wiring references
4 minute read · Shared guidance for clothes dryers
Choose the right kind of diagram
A dryer diagram may show dimensions and clearances, exhaust routing, utility connections, control-panel labels, or internal wiring. Identify the question before searching: an installation layout helps plan a closet, while a wiring schematic is for diagnosis by service personnel. A product brochure can supply useful dimensions and option lists, but it is not a complete wiring reference. Use the owner and installation materials for owner setup, and obtain a service document only for the exact model and revision when a repair professional needs it.
The model number matters because a family can contain gas and electric versions with different circuits and vent options. The LG DLEX4000/DLGX4001 specification is a scoped example: it distinguishes electric and gas variants and their venting options. Do not use that family’s diagram or a similar-looking model’s schematic to guide another dryer.
State whether the need is space planning, vent layout, controls, or service diagnosis.
Match the complete model identifier and fuel type to the document.
Check document title and revision before treating a diagram as applicable.
Owner-safe installation diagrams
For an owner planning a replacement, prioritize diagrams that show cabinet dimensions, door-open depth, clearances, and installation spacing. Measure the route into the room as well as the final location; a dryer can fit the closet but fail to pass through a hall turn. Check whether a closet requires ventilation openings and whether stacking changes the height and access. The LG 5500 specification includes recessed and closet spacing examples for that family, not a universal layout for all dryers.
For vented models, a route drawing should identify the outlet direction and path to the exterior. Compare it with the model’s permitted vent configuration and the actual wall opening. A diagram does not excuse a crushed or excessively restrictive exhaust. Condenser and heat-pump dryers may not share the same exhaust layout; consult their own installation materials for condensate handling and airflow.
Measure the entry route, appliance location, and door swing against the diagram.
For vented units, trace the duct to the exterior and verify approved direction.
Use the exact design’s installation drawing for clearance and moisture handling.
Reading a wiring reference without doing electrical work
Wiring diagrams label circuits and connectors so trained service staff can diagnose a specific appliance. They can be difficult to interpret without the correct schematic and test procedure, and a diagram alone does not make energized testing safe. Do not remove covers, probe terminals, bypass a door switch or thermal safety, or use a gas diagram to adjust a fuel component. If the symptom points to power, heat, or a control fault, give the service provider the model, symptom sequence, and any display message; let that person select the correct technical reference.
A gas dryer and electric dryer require different diagnostic paths. Even within one family, their supply requirements differ. A wiring sheet from the wrong variant can direct attention to nonexistent components or unsafe assumptions. Confirm the full model suffix, serial range, and document applicability through manufacturer support or the service provider.
Provide the exact label information and observed behavior to the service provider.
Ask the provider to confirm the schematic applies to the specific variant.
Leave cabinet access, electrical testing, gas work, and safety circuits to qualified service.
Use the drawing to check an installation, not guess a repair
A diagram is most useful when paired with a physical observation. If a vent layout seems wrong, compare the dryer outlet and duct path to the drawing and photograph visible conditions without moving the machine unsafely. If dimensions conflict with the space, remeasure from finished walls and account for trim, hoses, and door travel. If an installation differs from the drawing, document the difference for the installer rather than improvising a connection.
For a replacement component, a parts diagram can help identify how the manufacturer names an assembly, but it does not prove the cause of failure or confirm that a similar part fits. Obtain a parts lookup by exact model and serial range. Where no owner-facing diagram is available, ask manufacturer support or a repair provider for the right document instead of relying on forum images or copied schematics.
Compare the drawing with visible installation conditions and note discrepancies.
Use a parts illustration for identification only, not diagnosis or fit approval.
Request model-specific documentation when the available reference is incomplete.
What to do with what you find
The drawing is for a family but omits the appliance’s fuel suffix or revision.
It may not represent the installed dryer’s connections or components.
Confirm exact applicability with manufacturer support or a service professional.
A diagram indicates a vent route that differs from the observed setup.
The installation may need review; the illustration alone does not authorize rerouting.
Have the installer compare the setup with the exact installation guide.
Have these details ready
Full model and serial label details
Document title and revision
Photo or measurements of the installation discrepancy
Exact question the diagram must answer
Common questions
Can an owner use a wiring schematic to test a dryer?
A schematic is not a safe test procedure. Keep cabinet access and electrical or gas diagnosis with qualified service.
Are specification-sheet diagrams sufficient for internal component repair?
Usually they show product dimensions or options rather than a service schematic; request the exact technical reference needed by the repair professional.
General background sources
These sources support the shared guide. Exact model specifications and matched family procedures have their own sources above.
Explicit product_first_distribution_date in exact OEM primary SKU record; not a manufacturing year or import date. Primary source: https://www.geappliances.com/appliance/GE-Washer-Dryer-24-Stack-Bracket-Kit-GE24STACK