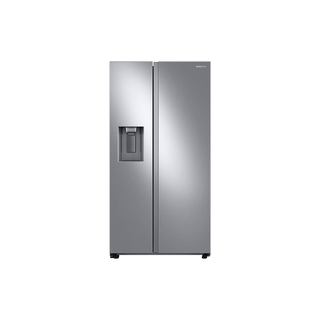
Samsung RS27T5200SR/AA side-by-side refrigerator
Samsung RS27 installation: dimensions, water line and first checks
The RS27T5200SR/AA is a full-size side-by-side with an external dispenser and two separate doors. Delivery planning has to account for the path into the room, the final door swing, water supply, and the control/display location. Samsung’s specification sheet provides model dimensions and electrical data; the owner and installation documents govern clearances and connection details.
The highest-value installation check is documenting whether water and ice work correctly before the delivery team leaves. Samsung identifies two water lines on RS27T and RS22T models, and crossed connections can swap water and ice behavior. Capture the initial state and ask the installer to confirm dispenser and ice function after any door removal or reconnection.
Measure the refrigerator, opening and door swing
Samsung’s RS27T5200SR V7 planning sheet lists overall dimensions of 35 7/8 inches wide, 70 1/16 inches high and 33 1/2 inches deep, including the hinges, doors and dispenser. The cabinet without hinges and doors is 35 7/8 inches wide, 68 5/8 inches high and 28 15/16 inches deep. These are different measurements: do not use the smaller cabinet depth as the installed overall depth.
For the planning opening, the same sheet specifies at least 1 inch behind the refrigerator for circulation and connections, and at least 3/8 inch at the sides and top. Next to a wall on the hinge side, allow 2.5 inches where a handle may contact it. Samsung recommends avoiding a wall immediately beside the unit for full door opening. Confirm the packed installation manual and actual door/drawer movement before approving the space.
- Measure the opening at several heights, including baseboards, countertop overhangs and flooring.
- Measure every doorway and turn along the delivery route. Include the height needed for the hinges.
- Mark the rear, side and top spaces from the planning sheet, then check door swing against walls and islands.
Plan the water and power points
The RS27 documentation identifies filtered water/ice and an HAF-QIN filter. Confirm that the shutoff and approved supply connection are accessible without pulling the refrigerator out. The product sheet lists 115 V, 60 Hz, 5 A; use the full installation instructions and local electrical requirements to determine the acceptable connection. Do not infer that an extension cord or shared outlet is suitable from a rating line.
If the outlet is behind the unit, decide how the cord will remain unpinched as the refrigerator is positioned. Keep the water line out of the leveling-leg path and avoid sharp bends. The installer should check for leaks after connection and verify the refrigerator can be pulled forward for service without straining the tubing.
- Have the water shutoff and outlet identified before delivery; do not make an improvised line or electrical connection.
Document door handling
Samsung’s dedicated RS27T/RS22T guidance explains that the two door water lines must be correctly matched. If a delivery crew removes doors to clear a narrow opening, ask them to document reconnection and test each water/ice selection afterward. A cross-connection can make water appear during ice production or swap what comes from the dispenser. That behavior is not evidence by itself that the ice maker or water valve has failed.
Keep the paperwork, photographs, and installer name/date. If the refrigerator does not dispense normally immediately after delivery, report the timing and whether the doors were removed. Do not take off hinge covers or attempt to reconnect lines unless the model’s manual explicitly assigns that procedure to the owner and you are comfortable doing it; the safest route is to have the installer correct their connection.
- Ask the installer to demonstrate Water and Ice outputs after final placement and note whether doors were removed.
Level and settle the appliance
Samsung’s general leveling guidance says to use a solid, flat floor and check the cabinet itself from side to side and front to back. Do not judge level by whether the doors line up; doors can be adjusted separately. Follow the RS27 installation instructions for leveling-leg access and height. A stable cabinet supports even closure and gives a more reliable baseline for later door-seal and leak observations.
After connection, record initial display values and note when cooling and ice production are first observed. Do not invent a universal “ready” time based on another refrigerator. Use the exact manual and installer’s commissioning directions. Avoid loading warm groceries before the unit is ready to maintain safe storage conditions.
- Record initial settings and the installer’s completion time; note any door gap, rocking, or visible moisture.
Make the delivery checklist observable
Before signing off, check that each door opens without hitting a wall, closes without an item interfering, and has an even gasket contact path. Observe water flow and selection, then ask when the ice maker should first produce under the model instructions. A short video of normal dispenser output provides a baseline if an intermittent issue appears later.
If installation work leaves a leak, line kink, unusual display indicator, or swapped water/ice response, have the crew address it before leaving. Keep a copy of the model and serial label photo, purchase record, and service contact. These details make a warranty or installation call more efficient than starting from a generic refrigerator description.
- Save the label photo, installation receipt, and video of the initial water/ice checks together.
Common questions
What should I test before the delivery team leaves?
Confirm the doors close, inspect visible tubing for moisture or kinks, and test Water and Ice separately. If doors were removed, ask the installer to verify the two water lines are correctly reconnected.
Can I use the spec sheet as the installation guide?
Use it for dimensions and listed electrical information. Follow the exact installation manual for clearances, connection, and commissioning steps.