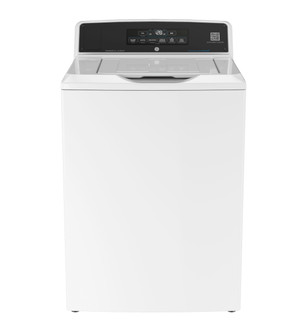
Browse installation, controls, care, troubleshooting, and replacement planning for GE VTW565ASVWB.
Capacity Total Capacity Cubic Feet
3.8 cu ft
Weights Dimensions Overall Width
26.8 in
0 detailed family articles0 short family notes48 detailed owner guides
Detailed articles use sources for the named brand and product family. Short notes add family details to shared guidance. Owner guides cover the product category and recorded design, with this model’s measurements and brand details shown separately. Exact controls and part fitment require a matching manufacturer source.
Locate the product identification, distinguish a model from a serial number, and use the exact model to find compatible documents and service information.
Read capacity, electrical, water, and performance information in context, and use the exact model’s documents for decisions that affect purchase or hookup.
Prepare a stable location and compatible services, then use the exact installation guide to coordinate setup, leveling, and an initial operating check.
Use the washer’s rating and installation documents to confirm a grounded supply, outlet access, and circuit suitability; refer electrical changes to a qualified electrician.
Prepare the washer for transport with the product-specific restraint, water and drain precautions, adequate help, and careful protection of hoses and cord.
Remove model-specific transport materials, prepare laundry products and supplies, and make a supervised first check for leaks, stability, and drainage.
Choose wash temperature by balancing the garment care label, soil, detergent directions, and the washer’s temperature controls. A selected setting may describe a target or mix rather than water straight from the tap.
A washer’s pause, cancel, cycle change, and power interruption can have different effects. Use the control behavior documented for the exact model, protect wet laundry, and avoid treating a reset as a repair.
Reduce washer odor by removing damp residue, keeping water and detergent from lingering, and using only cleaning steps supported by the exact washer’s instructions.
Check whether the washer is paused, still completing a cycle, or leaving standing water. Begin with accessible hose and household drain conditions; internal pump work is not an owner task.
A low fill can be normal on sensing high-efficiency washers. If no water enters, check the cycle state and visible household supply before treating it as a washer fault.
Work out whether the washer skipped spin, is still balancing the load, or cannot spin because water remains. Start with the load and visible setup before treating it as a machine fault.
Treat a display code as a clue tied to the exact washer, not a universal diagnosis. Capture the display and use the model’s owner instructions to choose a safe next step.
Classify the sound by when it occurs and whether the washer moves. Load distribution, floor support, installation materials, and normal cycle action can sound very different.
Locate when water appears and whether it returns during fill, wash, or drain. Safe visible checks can distinguish hose and drain issues from condensation or a spill.
When the panel lights but the cycle does not begin, check the selection, door or lid closure, pause state, and any lock indicator using the washer’s own controls.
Determine whether the washer is completely dark or has power but will not accept input. Check the visible supply and outlet situation without opening the appliance.
Poor cleaning, residue, odor, and excess suds often respond to changes in loading, detergent, cycle, and maintenance. Diagnose the actual symptom before changing several things at once.
Compare a washer repair with replacement using the same load needs, a written diagnosis, and full quote totals. The decision depends on the actual fault, parts and labor, installation, and what a replacement would change for your household.
Understand washer energy and water figures, then connect them to household use. Compare equivalent official information and consider cycle choices, load size, and drying effects without assuming a universal bill saving.
Calculate a household-specific washer cost from actual utility rates, usage, and comparable model data. Keep assumptions visible and separate washer electricity, water charges, and any household water-heating estimate.
Find the warranty that applies to your exact washer and prepare a useful support request. Separate general warranty language, model-specific written terms, and service decisions; coverage depends on the applicable documentation and facts.
Check official recall and safety notice sources using the washer's complete model and serial information. A search result is a lead; confirm applicability, follow the stated remedy, and report a hazard with specific evidence.
Establish a washer's age and product history from identifiers and records. Separate manufacture date, purchase date, installation history, and service events; avoid treating any one of them as a reliability forecast.
Review a washer’s published specifications against the laundry, installation, and ownership needs that matter in your home. Treat figures as model-specific claims and verify the exact variant before relying on them.
Build a fair washer comparison around your loads, room, utility setup, and ownership priorities. Verify each candidate’s exact variant and compare equivalent manufacturer information.
Plan a washer replacement around the physical route, opening, connections, floor, and chosen washer design. Confirm fit and installation conditions for the exact model before arranging delivery.
Compare washer offers using current seller quotes, exact model identifiers, itemized delivery and installation terms, and verified stock status. Build an owner-specific total rather than relying on generic price averages.
Prepare for washer service by describing the symptom, its timing, and the conditions that reproduce it. Decide whether routine owner checks apply or the problem needs a service visit, then confirm coverage and charges in writing.
Arrange washer removal through a local recycler, waste program, retailer, or donation route that confirms it accepts the appliance and can handle pickup. Prepare the unit for safe transport and verify local requirements.