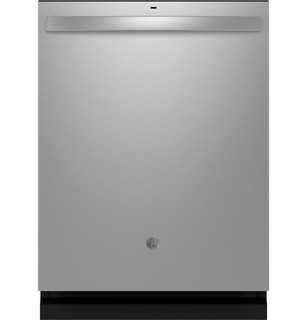
The GDT650 manual describes an Ultra-Fine Filter and Fine Filter and advises periodic inspection and cleaning; gritty dishes or reduced washing are reasons to check sooner. Remove the bottom rack and identify the filter assembly using the matching illustration before twisting anything. Some manual variants show an additional filter basket, so return only the pieces present in your appliance. Rinse and reinstall the owner-removable filters in the manual’s order; persistent debris or poor drainage needs service rather than pump access.
GE GDT650SYVFS is the exact code in this catalog record. This topic should be evaluated for that code and dishwashers category. The original source record is linked below; unrecorded settings, dates and compatibility remain unknown.
Keep the wash path clear, preserve spray coverage, and spot changes early with simple checks matched to your dishwasher’s filter and drying design.
Owner guide: Preventive maintenance
Category & symptom guidance
Preventive maintenance
3 minute read · Shared guidance for dishwashers
A useful maintenance rhythm
After a cycle, look over the tub floor and door edge for food scraps, standing water, or residue. A small amount of water below the filter may be normal on some designs; note whether the level or odor changes over time. Wipe loose debris away rather than pushing it into the drain opening.
Every few weeks, inspect the spray arms and the spaces around them. Remove visible food from accessible openings with a soft tool, and check that each arm turns freely when the racks are out. Do not force a tight arm or remove parts whose release method is unclear for your model.
Clean the filter to match its layout
Many current machines use a removable filter assembly at the tub bottom, but designs differ: some have one-piece assemblies, while others add a separate coarse basket. Identify the pieces visually before lifting or twisting anything. Remove loose scraps into the trash, rinse the parts, and use a soft sponge for film; abrasive pads can damage filter surfaces.
Reinstall each piece in its original orientation and make sure it locks or sits flush as designed. A loose or misseated filter can allow debris into the wash system. If the filter resists removal, stop rather than applying leverage; consult the product-specific care instructions or ask the manufacturer how that assembly releases.
Keep spray paths open
Load plates and cookware so water can reach their soiled faces. Before starting, spin the spray arms by hand and confirm tall utensils, pan handles, or hanging items do not catch them. A blocked arm can leave a repeating dirty patch even when detergent and cycle selection are suitable.
Scrape off bones, seeds, toothpicks, and large scraps. Ordinary soil generally need not be pre-rinsed, but avoid putting excessive grease or oil into the machine. Check that dishes do not obstruct the detergent cup, and secure lightweight plastics so they cannot shift toward a heating element or spray path.
Care for the outside and seals
Use a damp, soft cloth on the control panel and dry it afterward. Choose the door-panel method based on its material: painted, coated, stainless, and integrated-front finishes may have different care limits. Avoid scouring products unless the finish instructions explicitly allow them.
Wipe the door gasket with a clean damp cloth if crumbs or detergent collect there. Do not pull the gasket out or apply oils, bleach, or household sprays to it. Inspect the lower door edge for residue that could prevent a clean seal, and note any cracking or water escaping during operation.
Track changes that matter
Keep a short note when a new sound, smell, leak, or cleaning result appears: record whether the problem repeats, which rack is affected, and whether the filter was clean. This helps distinguish a one-off load issue from a recurring change without replacing parts by guesswork.
For condensation-drying machines, droplets on plastic or a cool tub can be consistent with the drying method. Heated-dry and fan-assisted designs behave differently, and some models extend fan operation after a wash. Compare the result with the exact model’s owner guidance before treating a normal design feature as a fault.
What to do with what you find
Soil remains on dishes in several positions after filter cleaning and an unobstructed load.
The issue may involve water delivery, temperature, or another fault beyond routine upkeep.
Note the cycle, load pattern, and any displayed indicator; use model support for next diagnosis.
Have these details ready
Exact model identifier if filter-release instructions are unclear
Whether residue repeats across loads and rack positions
Photo of filter layout or damaged accessible component
Common questions
Should I rinse every dish before loading?
Usually scrape away large or hard debris; routine pre-rinsing is not generally required. Follow your machine’s guidance for unusual soils.
Can I use a metal brush on the filter?
Avoid it. A soft sponge or brush is less likely to scratch filter surfaces.
General background sources
These sources support the shared guide. Exact model specifications and matched family procedures have their own sources above.