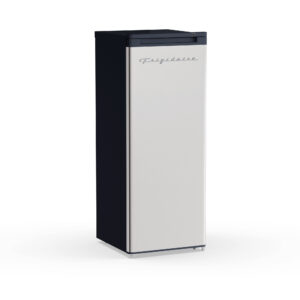
The manufacturer identifies an ajar lid/door and high humidity as possible causes of moisture on freezer exteriors. On an upright, inspect the full door gasket and make sure stored items do not prevent closure; distinguish condensation from water inside the cabinet.
Frigidaire EFRF694 is listed with Manual defrost. Use the manual-defrost branch below: plan cold storage for the food before melting accumulated ice, protect the floor, and use the documented drain arrangement. Keep sharp tools and direct heat away from the liner and refrigerant path.
Frigidaire EFRF694 is recorded as upright. Check the door swing, shelf or drawer seating, and packages projecting into the seal. For uneven cooling, keep the source-listed defrost design in view: airflow checks apply to a fan-cooled layout, while a manual-defrost layout has its own unloading and defrost procedure.
Trace frost to moisture entry, closure, loading, or a possible defrost problem; use the model’s defrost design and manual before removing frost or seeking service.
Owner guide: Freezer frost build-up
Category & symptom guidance
Freezer frost build-up
4 minute read · Shared guidance for freezers
Read the frost pattern first
A thin, temporary frost layer can follow humid air entering during openings. Heavy or rapidly returning frost, especially around the lid or door edge, points first to checking closure and gasket contact. Frost concentrated on food packages can also reflect moisture in uncovered food or repeated exposure during loading.
Observe where frost forms and whether it covers the whole compartment, one wall, the evaporator area, or the seal. The pattern is useful evidence for service, but it does not identify a failed part by itself. A manual-defrost freezer naturally accumulates frost; frost-free models use an automatic defrost system, so recurring heavy frost may require a different diagnosis.
Note the frost location, thickness, coverage, and how quickly it returns after defrost.
Check whether packages or baskets interfere with the door or lid sealing.
Reduce moisture entry and blocked closure
Close the door or lid promptly and make sure nothing prevents full contact with the gasket. Wipe visible debris from the seal using the cleaning method in the owner manual. Avoid overloading the cabinet so packages do not push against the lid, door, baskets, or air passages. Let hot food cool as appropriate before freezing, and wrap food to limit moisture release.
Room humidity and frequent openings can increase frost on manual-defrost models. Upright doors and chest lids have different closure geometry, so inspect the full sealing edge rather than assuming the same adjustment or gasket procedure applies. Do not use a guessed clearance or gasket repair method from another model.
Rearrange packages and close the appliance; confirm the seal contacts around the full edge.
Use the exact manual for gasket cleaning and any adjustment guidance.
Follow the defrost design
Manual-defrost chest and upright freezers need periodic owner defrosting according to their manuals; frost thickness guidance varies by source and model. GE’s chest and upright manual-defrost articles describe action around 1/4 to 1/2 inch, while the GE 2005 FCM5/FCM7/FCM9 manual says to defrost before frost exceeds 1/2 inch. These are scoped examples, not a universal interval. Current GE upright models are described as automatic defrost, while older uprights may be manual or self-defrost.
Frost-free models should not be defrosted by applying a manual-defrost procedure unless their manual specifically directs it. Identify the exact appliance and defrost design from the rating label and owner manual. If the manual calls for owner defrost, follow its unplugging, food protection, drainage, drying, and restart instructions exactly.
Look up the full model number and confirm manual-defrost or automatic-defrost design.
Use the manual’s threshold and drain directions; never assume a drain is present.
Avoid damage during defrost and cleaning
Unplug before manual defrost or cleaning when the owner manual instructs it, protect frozen food, and collect meltwater with only the drain hardware provided. Do not chip ice with knives or use electrical heating devices unless the exact manual explicitly permits a method. Sharp tools can puncture cabinet or refrigerant components; a damaged sealed system needs professional handling.
The Danby DCF035A6WM/DCF050A6WM/DCF070A6WM/DCF100A6WM manual gives a specific drain-cap procedure, cleaning method, and 2–3 hour maximum setting after defrost for that named chest family. Danby DUFM085A2BSLDD is a manual-defrost upright example with its own instructions. Do not transfer either drain route or restart timing to other models.
Use only the drain plugs, caps, or hose described for the exact model.
Dry the interior and reinstall any removed parts as directed before restoring power.
Recognize a possible defrost-system problem
On an automatic-defrost freezer, thick frost that returns quickly or blankets the interior may interfere with cooling and warrants model-specific troubleshooting or service. On a manual-defrost freezer, persistent frost after proper owner defrost can result from moisture entering, a closure problem, or another performance issue. Neither pattern alone proves a particular heater, sensor, control, or sealed-system fault.
If frost is accompanied by rising temperature, poor cooling, recurring alarm, or a door that will not seal, protect food using FoodSafety.gov guidance and contact the maker or a qualified technician. Share the model, defrost type, frost location, measured temperature, and recurrence after defrost. Do not open electrical panels or test internal defrost components yourself.
Measure cabinet temperature and apply food safety guidance if it is above target.
Arrange service if the problem returns despite correct closure and manual-directed defrost.
General background sources
These sources support the shared guide. Exact model specifications and matched family procedures have their own sources above.