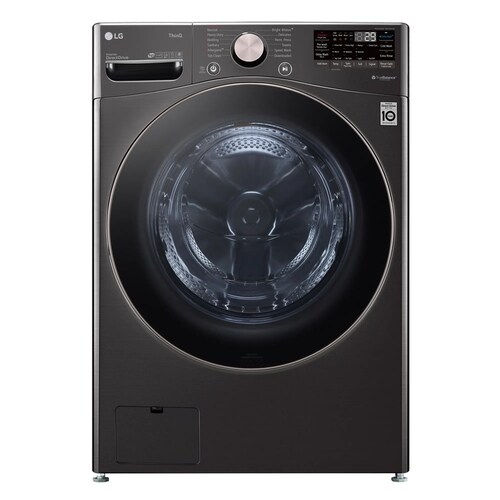
Check the visible drain path without moving the washer
When water remains after a WM4000 cycle, note whether the washer stopped before spin and whether the sink or standpipe also drains poorly. Inspect only the exposed drain hose for a kink or obvious displacement. The matching LG manual governs drain height and installation routing; do not pull a stacked or closet-installed washer forward to inspect behind it. Report the water level and cycle stage to support.
Route and secure the drain hose to the exact product’s requirements, prevent siphoning and kinks, and recognize when plumbing help is needed.
Owner guide: Plan washer drainage and water removal
Category & symptom guidance
Plan washer drainage and water removal
3 minute read · Shared guidance for washing machines
Choose a compatible drain point
The installation guide identifies acceptable drain arrangements, such as a standpipe or laundry tub, and gives the permitted hose height and routing. Check those limits for the exact model and local plumbing rules. A standpipe must be suitable for the washer’s discharge and remain open as directed; a laundry tub must be able to receive the flow without overflowing.
Do not reuse dimensions from another washer. For example, the LG WM4000H*A manual states its own drain height and distance limits. The GE PTWN6250M installation instructions give different conditions for that named top-load example. The differing figures show why one product’s drain range cannot be treated as universal.
Secure the hose without sealing it
Route the hose so it is not kinked, crushed, stretched, or trapped between the cabinet and wall. Use the supplied bracket, tie, or restraint as directed to secure the hose at the drain point. A hose that comes loose can flood the room, while a hose routed too low or sealed tightly into a drain can contribute to siphoning or poor wash performance.
Follow the manual’s air-gap instructions. Do not wrap tape around the hose and drain to create an airtight connection unless the product instructions specifically call for a compatible fitting. If the drain is inside a wall or otherwise difficult to access, secure the hose using the specified method and confirm it cannot slip out during discharge.
Test discharge and look for leaks
Use the model’s installation check or an appropriate first-use cycle to observe drainage. Watch the drain point and floor for leaks, confirm the hose stays secure, and check that the washer empties as expected. Keep hands away from moving parts and do not touch draining water if it may be hot.
If water backs up, spills, or drains out while the washer is filling, stop the cycle and inspect only visible hose routing and the household drain opening. A blocked home drain may require a plumber. If the hose connection at the washer is loose or the installation requires internal access, contact authorized service rather than removing panels.
Understand common water symptoms
A washer that fills and drains at the same time may have a siphoning or drain-height issue, but the exact diagnosis depends on the installation and design. A washer that will not drain may have a kinked hose, an unsuitable drain route, or a household plumbing blockage. Check the visible hose path and compare it with the model guide before changing anything.
Do not assume a particular drain height, hose clamp, or extension kit fits every washer. Extension parts must be approved for the exact model. If the hose is damaged, the drain arrangement cannot meet the manual, or water escapes during a cycle, stop using the washer until a qualified installer or plumber corrects the problem.
What to do with what you find
Water enters the washer and immediately exits, or the tub level does not hold during fill.
The drain may be siphoning or routed outside the model’s installation limits.
Compare hose height and air-gap arrangement with the exact manual; have the installation corrected if needed.
Water backs up at the standpipe or laundry tub during discharge.
The household drain may be restricted or unable to handle flow.
Stop the test and contact a plumber.
Have these details ready
Exact model drain height, distance, and securing instructions
Observed discharge and household drain condition
Common questions
Can I seal the drain hose tightly into the standpipe?
No, unless the exact installation guide specifies a compatible sealed fitting. Many installations require an air gap to prevent siphoning.
Are drain hose height limits the same for all washers?
No. Use the exact model’s installation instructions and local plumbing requirements.
General background sources
These sources support the shared guide. Exact model specifications and matched family procedures have their own sources above.