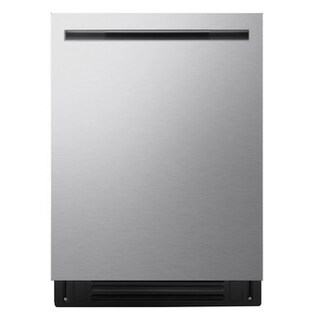
Specifications for LDNPH654S with owner checks for this product design. Use the matching manual for control sequences and replacement parts.
Specifications & model details
LDNPH654S: model-specific checks
Start with the source identity
LG LDNPH654S is the exact code in this catalog record. This topic should be evaluated for that code and dishwashers category. The original source record is linked below; unrecorded settings, dates and compatibility remain unknown.
Verify the drain hose route, sink or disposer connection, and required air gap or high loop so wastewater cannot return to the dishwasher.
Owner guide: Drainage & water removal
Category & symptom guidance
Drainage & water removal
4 minute read · Shared guidance for dishwashers
Trace the complete drain path
Follow the drain hose from the dishwasher area to its connection beneath the sink. Identify whether it enters a disposer inlet, a sink tailpiece, or another approved connection, and note any air gap at the counter. Compare this route with the exact installation instructions and local plumbing requirements; a familiar-looking loop is not proof that the installation is correct.
Check that the hose is not crushed behind the appliance, kinked in the sink cabinet, or stretched tightly over a sharp edge. A restricted route can slow draining or leave standing water. Do not pull the dishwasher out to inspect hidden connections unless the installer has made that safe and appropriate.
Check the disposer or sink connection
When the hose connects to a food disposer, confirm that the dishwasher inlet is prepared as the disposer manufacturer requires. A closed inlet plug can block drainage even when the hose is attached. If a disposer was recently installed or replaced, ask the installer to verify the inlet preparation and connection before the first wash.
For a sink-tailpiece connection, confirm that the fitting is intended for dishwasher drainage and that the hose is secured without being flattened. Do not improvise a connection to an unrelated drain opening. The exact allowed arrangement depends on the dishwasher instructions and local plumbing code.
Understand the air gap and high loop
An air gap is a separate plumbing fitting that helps prevent a clogged sink drain from backing wastewater into the dishwasher. Not every jurisdiction requires one, and not every installation has one. If yours is present, check for debris or a blockage when drainage is poor; the GE manual for the covered GD/PD models describes cleaning the air gap’s accessible cap and cover.
Where an air gap is not used, the installation instructions may require the drain hose to be routed high under the counter. The height and attachment method are installation-specific. Do not copy a loop height from another model’s guide or lower a hose to make it fit without checking the applicable instructions.
Respond to water left in the tub
A small amount of water in a designated sump area may be normal for some designs; water spread across the tub floor after a completed cycle may point to a drainage problem. First note when it appears: after a cycle, after the sink or disposer runs, or while the machine is idle. That timing helps distinguish a slow drain from wastewater backing up through the plumbing.
Check only accessible causes: clear visible food debris from the sink strainer, verify the disposer is not backed up, and inspect an accessible air gap for obstruction. The GE shared manual lists a clogged air gap or disposer and incorrect drain routing as possible contributors for models it covers. Do not remove internal panels or reach into a running appliance.
Confirm the repair with a controlled check
After a plumbing correction, have the installer run the model’s prescribed drain or commissioning check and inspect the sink cabinet and floor for leaks. If water rises in the tub when the sink drains, or wastewater has an odor, stop using the dishwasher and have the shared drain connection assessed. A recurring backup needs a plumbing diagnosis, not repeated wash cycles.
Keep a photo of the under-sink routing and the completed installation record. It can help an installer see whether a later change to a disposer, sink, or cabinet altered the drain path. Ask before moving the hose during unrelated sink work, since even a small route change can defeat a required high loop.
What to do with what you find
Water remains after the cycle and the disposer or air gap is visibly obstructed.
A sink-side blockage may be restricting discharge.
Clear only the accessible obstruction and have the drain route verified if the symptom returns.
Wastewater enters the dishwasher when the sink drains, or the hose route is unknown.
The drain connection may permit backflow or may not meet installation requirements.
Stop dishwasher use and have the sink connection and required high loop or air gap checked.
Have these details ready
Exact model drain installation instructions
Photo or description of disposer, tailpiece, air gap, and hose route
Timing and amount of standing water
Installer’s drain check and leak inspection
Common questions
Is a visible air gap required in every kitchen?
No. Requirements vary by local code and installation; follow the model instructions and local plumbing rules.
Is any water remaining in the bottom automatically a fault?
Not necessarily. Note whether water is confined to the sump or spread across the tub, and whether it appears after sink drainage.
General background sources
These sources support the shared guide. Exact model specifications and matched family procedures have their own sources above.
Owner guidance by Specs & Parts, drafted with GPT-6 Luna. Sources and scope.
This record does not establish exact drainage & water removal values. Use the matching manufacturer document to fill in the missing requirements; the category guidance below helps organize that check.